Showing posts with label Customization. Show all posts

May 18, 2016

Search Results vs. Content Search Web Parts: customizing and date formatting

The default way to display feeds from news, events etc. on an intranet front page is to use the Content Search Web Part. Used to be Content Query, but customizing the CQWP is way more complicated plus it is restricted to the same Site Collection only. This is still used, as is, by many of my customers, for it is easier for content managers to set up than the search queries. Anytime any custom templates are needed (or when I am setting up the feeds), definitely CSWP is the way to go.

Lately, though, I have had several customers with SharePoint Standard lisence only. Unfortunately this leaves out the CSWP completely. Search indexing and search driven content is still available, but building those said feeds is just a tad more complicated for you need to use the Search Results Web Part, which is not created for this kind of usage, even though it CAN be used. It requires some more work, but once you've figured out the basics, it's not that difficult. Just a bit different than the CSWP.

The display templates of CSWP consist of a control template and an item template (for more info, see my post "The Anatomy of SharePoint 2013 Display Templates"). Mostly the modifications and customizations are rather straightforward to make by following the example of things already there. The date formatting, however, is a bit tricky. What you need to do is:

1) Copy the item display template you want to modify from MasterPages gallery, Display Templates, Content Web Parts directory.

2) Create a managed property of the field you want to use, if not using Created or LastModifiedDate, in Search Schema.

3) Use the date field as value for desired line data, eg:

var line1 = $getItemValue(ctx, "Line 1");
var line2 = $getItemValue(ctx, "Line 2");
var eventdate = new Date(line2.inputValue);

4) Format the date as you wish in the HTML where the value is rendered:

 <div class="cbs-Line2 ms-noWrap" title="_#= $htmlEncode(line2.defaultValueRenderer(line2)) =#_" id="_#= line2Id =#_">_#= eventdate.format("d.MM.yyyy H:mm") =#_</div>

5) Upload your display template (remember to change the title in the HTML and rename your modified file) back to the same folder in MasterPages gallery and publish it. It's ready to be used.


As for the Search Results web part, the system is slightly more tricky. First off, there are more display templates involved: 
  • Control templates
  • Item templates
  • Item HoverPanel templates
Mostly, you need to work with Item templates and/or hoverpanel templates, if using the hover panel. In the case of displaying feeds on front page, the hover panel is seldom wanted. It can be removed. Simply delete highlighted parts from the display template you copied, eg. ItemDefault (note, that the Search Result templates are in the Search folder):

<div id="_#= $htmlEncode(itemId) =#_" name="Item" data-displaytemplate="DefaultItem" class="ms-srch-item" onmouseover="_#= ctx.currentItem_ShowHoverPanelCallback =#_" onmouseout="_#= ctx.currentItem_HideHoverPanelCallback =#_">

And then comment out the following line:

 <!--  <div id="_#= $htmlEncode(hoverId) =#_" class="ms-srch-hover-outerContainer"></div> -->

Other modifications that I have found useful and quite necessary in said use case are
  • removing the item URL - actually in default item template I just remove the whole default body render tag:
    _#=ctx.RenderBody(ctx)=#_
  • building your own stuff to show for each item, e.g. rollup image, a content summary, publish/create date eg. 
Adding fields to the display template is simple enough. The fields need to be managed properties in Search Schema, so remember to do this first for any custom fields. Then you add the properties to the template mso:ManagedPropertyMapping tag:

<mso:ManagedPropertyMapping msdt:dt="string">'Title':'Title','Path':'Path','Description':'Description','EditorOWSUSER':'EditorOWSUSER','LastModifiedTime':'LastModifiedTime','CollapsingStatus':'CollapsingStatus','DocId':'DocId','HitHighlightedSummary':'HitHighlightedSummary','HitHighlightedProperties':'HitHighlightedProperties','FileExtension':'FileExtension','ViewsLifeTime':'ViewsLifeTime','ParentLink':'ParentLink','FileType':'FileType','IsContainer':'IsContainer','SecondaryFileExtension':'SecondaryFileExtension','DisplayAuthor':'DisplayAuthor','Created':'Created','NewsSummary':'NewsSummary', 'PublishingImage':'PublishingImage' </mso:ManagedPropertyMapping>

Then you use this to build your own HTML for the items, eg.

<div id="_#= $htmlEncode(itemId) =#_" name="Item" data-displaytemplate="DefaultItem" class="ms-srch-item">
    <div class="newscontainer">
<div class="newstitle">
<a href="_#=ctx.CurrentItem.Path=#_">
_#=ctx.CurrentItem.Title=#_
</a><br>
               <span class=newsdate>
              _#=ctx.CurrentItem.Created=#_
</div>
<div class="newsbody">
<div class="newsimg">
_#=ctx.CurrentItem.PublishingImage=#_
</div>
<div class="newstext">
_#=ctx.CurrentItem.NewsSummary=#_
</div>
</div>
</div>

Note the date there, though. It will give you a very long date format by default, but in a Search Results template it is way easier to format the date than CSWP. Simply add format(yourdiesiredformatting) to the value in HTML. Like this:

_#=ctx.CurrentItem.Created.format("d.M.yyyy")=#_


Then there is only one little nuisance left: the hover background color. 


This comes from this CSS rule: 

.ms-srch-item:hover, .ms-scrch-resultHover:hover, .edisc-SearchResultItemContainer:hover{
background-color: rgba(...);
}

Now, if you override this as is, it will effect the search results pages too. So try to identify the targets in some way, use eg. .welcome or .article classes for targeting content pages only in removing the hover color.

Whew! All done!

Mar 7, 2016

Tip: Fix List Issues After Migration 2010 -> 2013

Once again, faced with issue after issue. There was a SharePoint intranet that was migrated from SP2010 to SP2013. There was a list in the intranet, containing crucial information that should be easily searched. However, there was no list search available. Also, none of the columns were site columns. So I set out to create a search page for the list data. Everything runs cool if you just try to search with data in the title field (or author). However, there were some other fields including data to search wih.

Piece of cake, I thought to myself, disregarding the fact that most of the time the pieces of cake are tough to chew when it comes to SharePoint. I created some site columns and added them to the list, positioning them next to the original ones, with the intention to simply open the list in quick edit mode and copy values from list columns to site columns. Easy enough!

However, the list being a custom list originating in SP2010, the quick view was unavailable. I contemplated on exporting the data to Excel, modifying it there and creating a new list using that sheet. Before attempting that, I decided to google just a bit in hopes of finding a solution. And I did, hurray for Saludeen Rajack!

Since I had already tried most of the tricks in the blog post, in vain, I crossed my fingers and opened the list page for editing, opened list web properties and added clienttemplates.js to the JS Link property of the web part (at the very bottom of the Miscellaneous section).


And lo and behold! First of all, the list search box appeared at the top of the list and secondly, the quick edit button became active. 


Now I could proceed with my plans properly.

Oct 6, 2015

Scoped search results predefined empty

Many are the things you think should be simple in SharePoint, and yet they're not. Another day, another little issue to solve. 

We have made this JavaScript listing of subsites inside a site collection. A site directory. For certain reasons the Content Search Web Part nor the Table of Contents was the thing. That aside, I'm not going into that more deeply here, the other thing that was needed there, was the ability to search the directory.

One would imagine, that it would be simple enough to add a search box to the page, and a search results web part, and then configure it to show only results for search box queries, and show nothing unless a query is made.

Not so much. Not a big deal either, but requires a couple of tricks.

First of all, you need to set the query for the results web part. In this case, there are three things to set up: 
  1. The results need to be restricted to this site (or site collection, depending on where you're setting this up) only
  2. The results need to be site item type only
  3. The results need to be restricted instead of filtered by the search box query (as would be the default, the results web part showing a listing of all sites unless a query is made)
With all this noted, the query would look like this:
{?{searchTerms} path:"https://YourSiteOrSiteCollectionPath"  contentclass:STS_Web}

This can be either typed in, or if you need to modify the result types etc. use whatever query settings are provided. Just be sure to wrap the whole thing inside the {parentheses} with the
?{searchTerms}at the very beginning of the clause.

In the web part properties you might want to tick off some of the settings like eg. choose to not show the adanced search link, preferences link, language dropdown etc. The setting you won't find there, even though the search results display template actually hints that it should be there, is to select "Show nothing when there are no results". The Content Search Web Part does have this setting, so I was kinda surprised.

This just means, that when no query has been made or it does not provide results, you will see all these suggestions and tips in the web part:


In order to be rid of those (or at least the suggestions), depending on what you want - in this case, the web part needed to be completely empty unless there were some search results to show - you need to modify the display template for the search results. I.e. download a copy of the default one, make the necessary changes and upload your modified one to the gallery. 

All the display templates of a site collection are located in the Master Pages gallery, Display templates folder. Search results display template is in the Search folder. Download a copy of the original html file.


Open the downloaded file in an editor (I prefer Notepad...) and search for the div with the id of NoResult.

<div id="NoResult">

Inside that div you can see a bunch of JavaScript and html. If you only wish to get rid of the suggestions, delete only the <ul> element from the page, or replace it with something of your own. 


As it went, I wanted nothing to be shown unless there were some results, so I emptied the NoResult div completely. 

Change the title of your template (third row of the template) and save it locally with a new name. Upload your modified template to the same Search directory of the Display templates as the original one. Don't worry about any .js files; SharePoint will generate it upon upload. 

You most probably will need to publish your template before it can be used in the web part. When this is done, navigate back to the page with the search results web part you are setting up and open the we part properties. (Note, the page needs to be saved and reopened for editing before it can find the new display template)

In the Display Templates settings select your modified template.


Save web part properties, save (and publish) page and the search is ready.


Sep 24, 2015

Modify SharePoint List Alert to Show ID

There is a list in SharePoint, that seems to be quite overlooked. It is, however a pretty ok light weight ticketing system for a project. Yes, I'm talking about the issue list. One advantage the issue list has over a general task list is that it automatically notifies the person if he or she is set as the assignee of the issue. It used to be, that this notification email - alert - contained the issue ID both in the subject and the email body. Not anymore. 

One of my customers uses issue lists for project ticketing and after migrating from an older version of SharePoint they noticed that the emails no longer had this ID in them. It is quite important for them to have the ID easily available. So I set out to modify the alert templates.

There is no specific alert template for issue list. However, there is one for this assigned to notification email. See the MSDN article about alert templates for further reference on all of the different templates. 

In SharePoint 2013 all alert templates are in one XML file located in the C:\Program Files\Common Files\microsoft shared\Web Server Extensions\15\TEMPLATE\XML directory on the SharePoint App server. The file you need is alerttemplates.xml.

As with anything located in the SharePoint root, you should not modify the original template file, but make a copy of it in the same directory and rename it, eg. alerttemplatesIssueId.xml. Then open this copy file for editing (notepad will do, VisualStudio is more colorful ;) ).

It is a long winded file. The AlertTemplate elements wrap each different template. Each has the template type set as value for Name attribute, e.g. Name="SPAlertTemplateType.GenericList".

In order to simply make the Issue ID visible in the notification email for changed "assigned to" value, find the SPAlertTemplateType.AssignedtoNotification template. Find the properties element. Remove ID from the ImmediateNotificationExcludedFields.


This will make the ID visible in the email body of this notification email. If you wish to have the ID visible in any alert a user subscribes to regarding the Issue list, you will need to remove the ID from the exclude fields of the properties in the GenericList template, since issue list does not have one of its own. Note, that all the other templates have two properties, the Immediate and Digest notification exclude  fields.


This was not enough for my customer, since they wanted to have the ID also in the email subject. This can be achieved rather easily by adding the ID field variable to the subject element. The trick, especially with the AssignedToNotification template, is to find the correct place. 

The ID field variable itself is added as a single tag element: <GetVar Name="NewValue#ID" />

The place to add it to, is next to the item name or list name, eg.


In the AssignedToNotification template this is crammed between two switch elements, inside the subject element. In the GenericList template, the subject element is far more simple:


This would already display the ID in the subject, but just to make it a bit more readable, you should add some HTML between the variables, eg.


Now, save your alert template. In order to get SharePoint to use this template, you need to run a little stsadm command. The easiest way is to open the SharePoint Management shell, run as admin, and then run the command:

stsadm -o updatealerttemplates -url http://<sitecollectionUrl> -filename "C:\Program Files\Common Files\Microsoft Shared\Web Server Extensions\15\TEMPLATE\XML\alerttemplatesIssueID.xml"

(Note, copy-paste will probably not work for the command because of the quotation marks)

After running this command, you need to do an iisreset, and that's it. Your templates are ready and in use!


Sep 17, 2015

Broken Blog Post Filtering in SharePoint 2013

Some time last spring I created two blog sites to a customer SharePoint 2013 intranet. I set them up quite similarily, the only difference being that I added some custom fields to the other one. This should, in my logic, not affect anything in the different blog views - such as archives and category views - since I didn't touch any of the OOB fields. Whatever the reason, the end result was however, that last week the customer noticed (hmm, not very active blogging then ;) ) that on the other blog site the category and archive pages were broken. They did not filter the posts anymore as they should.

I banged my head against the wall for a while, googled, googled some more and tried this and that. Nothing seemed to help. One workaround I tried was this most commonly mentioned solution of adding a URL filter web part and setting it up as instructed eg. in this post here.

This, however, did not work for me, or this customer site. Be it due to the language pack (Finnish site) or something else, but it did not work. So I needed something else. This is what I did:

1) I created a new blog in the test environment. Really it doesn't matter where, just as long as you can access it in SharePoint Designer.

2) I opened both the new non-broken blog site and the old broken one in SharePoint Designer. I know. I sighed deep when I realized I really needed to go that far. But unfortunately the problem seems to reside in the corrupted query of the posts web part and in order to fix that, yes, SPD is required.

3) The two pages that are not working properly when categories and archive are not filtering posts, are Categories.aspx and Date.aspx. These are not in the Site Pages library of the blog site; you need to dig them out from the All files directory. 
All files > Lists > Categories > Category.aspx
All files > Lists > Posts > Date.aspx

Open both files on both your broken site and the new one created.

4) No, copying all code from one to the other will not work because of the GUIDs. As stated earlier, the broken part is the CAML query of the Posts web part. So the first thing to do is to locate the Posts web part. Since you are working in code view only, look for the main place holder with the blog-MainArea to find the correct web part.


5) Focus on the line starting <View Name="{...

6) Scroll horizontally (or set your page to wrap lines) until you find the <query> tag. This begins the CAML query for the web part. On the borken page it was missing parts. So I copied the query (everything between the <query> and </query> tags) from my new site category and date pages to the broken corresponding ones, replacing the broken queries.

7) I saved my files and tested them. The initial refresh filtered posts nicely, but the blog navigation (the categories list and the blog archive) links were broken, for the Blog tools web part was broken. It seems that any time you open a blog page into SharePoint Designer, this web part breaks.

8) So, I edited both pages in the browser, deleting the broken Blog tools part and adding it back in place and yes, things started functioning again! 

Hope this helps someone else save some time. Boy, there's never a boring day with SharePoint!

Mar 20, 2014

Using SlickNav with SharePoint

Responsive design in the word of the day, and recently full responsiveness has become more and more required in intranets too, and not only in Internet sites. This led me to trying out the SlickNav with a SharePoint site of a customer, and was happily surprised, when everything mostly went in a truly slick manner! Anyone working with SharePoint will, however know, that slick with SharePoint has a whole different meaning than slick in a simple HTML+CSS web site. So a few notes from my journey with SlickNav.
  • For basic implementation it really is enough to download the SlickNav package from the web site, and follow the general instructions of usage.
  • Include the jquery.slicknav.js and slicknav.css files in your project, as instructed.
  • Remember to refer jQuery in your MasterPage along with the SlickNav files.
  • As for SharePoint, if using the OOB menus, there obviously is no ul with the id of "menu"; instead you can use "div.ms-core-listMenu-horizontalBox > ul.root" for the element selector and it works like a dream.
  • Remember to set the prependTo property for the initializing function, e.g.
    prependTo: '#mainnav'
  • I also found it useful to set the allowParentLinks property to 'true', so users can clikc on the parent links in a similar way as the regular SharePoint navigation
  • If you are using dynamic nodes in SharePoint navigation, you need to set the styles for
    .slicknav_open ul.dynamic {
       top:0;
       left:0; }

    in order to show the dynamic navigation; otherwise it is still hidden somewhere at left:9999px etc.
  • The dropdown tends to fall behind the page content, so set the styles for
    .slicknav_nav, .slicknav_nav ul {
        position: relative;
        z-index: 100; }
  • A varying amount of other css tweaking is needed to make it neat in SharePoint.
Still, I wouldn't say it was a really big issue to get the SlickNav up and working and even stylized nicely for the customer.


Sep 27, 2013

Inbuilt IE8 hack for SharePoint 2013

Doing yet another UI branding for a customer, and especially the optimzation for each and any Internet Explorer version from 8 on, I stumbled upon something quite interesting and useful too.

I mostly prefer the CSS rule hacks (e.g. using /9 for IE8) over comments and separate stylesheets and/or classes (read more about the options in Web Designer Wall), and try to come up with the most browser-generic solutions as possible. But IE8 is a problem child, that's for sure (fortunately, with SP2013 we don't need to deal with IE7 anymore!). 

The SharePoint team has obviously noted this too. So what I discovered today, when changing the color of the left side of the suite bar (id="suiteBarLeft") is this general class ms-core-needIEFilter that gets inserted to the page by some SharePoint JavaScript when the browser mode is Internet Explorer 8.

For example, this suiteBarLeft just happens to get an IE8 fix for its background, resulting in my custom background color not taking effect. And !important does not do the trick, for the overriding CSS rule is actually a filter rule, not background(-color) rule - which is there too, actually, set to transparent, so the complete fix for the suiteBar backgrouns customization is

.ms-core-needIEFilter #suiteBarLeft {
    filter:none;
    background-color: #92D050;
}


As stated, this class ms-core-needIEFilter exists globally (somewhere - I could not place the class in the DOM tree) on the SharePoint pages when browser is IE8, and thus is quite useful for any IE8 hacks that are needed in any custom UI. I tried out a few, and it works like a dream :)

May 14, 2012

Adding Properties to a Web Part

When you create web parts for SharePoint, you can give the content managers the possibility to set some properties for the web part. These properties need to be set in the beginning of the webpart class, e.g.

private int_numTiles;

[WebBrowsable(true), //needed for visibility in web part properties in browser
WebDisplayName("Number of tiles per row"), //set the display name for the property field
WebDescription("Number of tiles per row"), //description for the property
Personalizable(PersonalizationScope.Shared), //enables setting the property for the shared view
Category("Tile Settings") //create your own property group (instead of the default Miscellaneous)
]

public int numTiles
    {
            get { return (_numTiles); }
            set { _numTiles = value; }
    }

The property above would be a simple text box field. You can use different types of properties to collect the settings data needed:
  • string, int and DateTime are text fields
  • enum is a dropbox
  • bool is a checkbox
As for this particular case (that is, setting the number of tiles on a row in my Metro Tile Web Part) where the only possible number range that my web part would accept, the dropdown (enum) would be a better approach than a text box, or at least that way I can bypass the otherwise mandatory if-else (or property value check) by offering only the possible choices. The enum type in itself is a bit more work thatn the other properties, for you need to 
  • declare the enum type first:
    public enum TileEnum{One=1,Two=2,Three=3,Four=4,Five=5};
  •  then declare the property:
    private  TileEnum _numTiles;
    ...
    public  TileEnum  numTiles ...
  • and in this case, convert the value to int for use in switch
    int TilesPerRow = (int) numTiles;
    switch (TilesPerRow){
    Case 1:
         tileclass = "onetile";
         break;
    ...


[The article about creating the tile web part: Creating a Metro Tile Web Part]


May 8, 2012

That Darn Navigation!

Earlier, I have written about the two different global navigation controls that can be used in SharePoint 2010 MasterPages, the foundation (v4.master) version, and the publishing navigation. Essentially, they both come out the same, but then again not. In publishing navigation, you can quite easily hide the top level site link, as the site logo quite frequently serves that purpose and thus the link on navigation bar is most often more or less futile and takes up space. In the foundation navigation control, this cannot be done (as easily, maybe? so far I have not figured out a way).

Both controls can be used in any kind of MasterPages, whether targeted to publishing or foundation sites, as long as 
a) using the foundation navigation you are ok to display the top level site in the navigation or
b) using the publishing navigation you are either ok with always using the complete global navigation on team sites too, or configure the start node to be displayed and set the static display levels to 2 (otherwise the navigation will be empty when team sites don't use the navigation bar of parent site)

There is just one little problem with the publishing navigation, at least when using the CombinedNavSiteMapProvider, and same applies to GlobalNavSiteMapProvider. When using special characters, such as & marks in the site names, they get html encoded in the navigation bar,
e.g. Test & Try > Test &amp; Try

In the publishing sites, i.e. publishing site targeted MasterPages, you can alternately use the CurrentNavigation as the sitemap provider, which does not have this character problem, but with the foundation sites, this again causes a problem, as Lists, Libraries, Discussions etc. start invading the top navigation!

Finally, after testing out different providers, I found that one option is to revert back to the one used in MOSS 2007: the GlobalNavigation. It works both in foundation and publishing sites, and supports both the special characters and hiding the top level site. So far, I know of no actual problems with it, so here you go:

<publishingnavigation:portalsitemapdatasource id="topSiteMap" runat="server" enableviewstate="false"
              sitemapprovider="GlobalNavigation" startfromcurrentnode="true" startingnodeoffset="0"
              showstartingnode="false" trimnoncurrenttypes="Heading" />
          <!-- top navigation menu (set to use the new Simple Rendering) -->
          <SharePoint:AspMenu ID="TopNavigationMenuV4" runat="server" EnableViewState="false"
              DataSourceID="topSiteMap" AccessKey="<%$Resources:wss,navigation_accesskey%>"
              UseSimpleRendering="true" UseSeparateCSS="false" Orientation="Horizontal" StaticDisplayLevels="1"
              MaximumDynamicDisplayLevels="0" SkipLinkText="" CssClass="s4-tn">
          </SharePoint:AspMenu>

Mind, that if you want the team sites to use their own instead ot parent's navigation, you still ought to use e.g. the foundation navi control or set the attributes to this navigation as stated earlier.  

Mar 15, 2012

Boost Up Your SharePoint

Even though I am very much pro-wsp, that is, building (UI)stuff in SharePoint the "right way", in VisualStudio, and packaging it into a wsp with features, I acknowledge that there are cases and situations where it really is not in the customer's - the SharePoint holder's - best interest to do it the long and expensive way, but instead make a lightweight solution directly in the site.

This - tweaking, enhancing, boosting the existing environment - is what I talked about at Techdays Finland last week. The slideset (in Finnish) can be downloaded from the Techdays site, video will be available later on, and here is a summary in English.

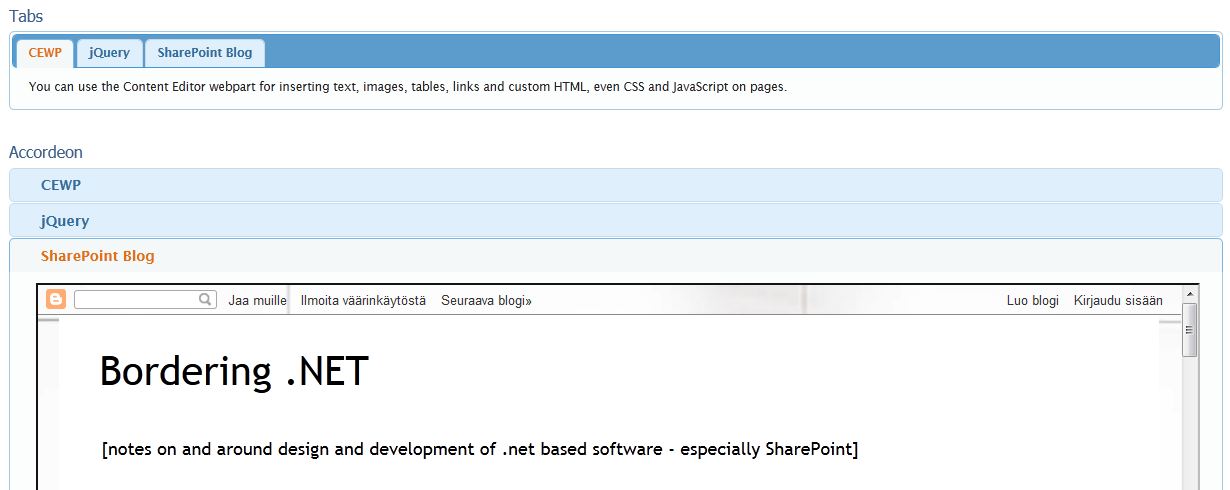
The basic thing to understand is that SharePoint pages are built with html and css, just like other web pages. The frame of the page is the html - xhtml more specifically, unless html5 has already been implemented - of the Masterpage. This you cannot alter - nor any other existing html on the pages - but you can manipulate it with css, and you can add your own html on pages too. 

On a wiki page, the additional css and html are inserted straight to the page by editing the html of the page (you might want to convert it to xhtml first); no Web Parts are needed for this. You could even create your very own Text Layout inside the wiki page by using the One Column Text Layout and then creating your own divs (or table, if you wish) in the html editor. You can hide elements on the page, e.g. the left side navigation (see my earlier post on this) - use IE Developer Toolbar or Firebug etc. to find the elements - but you cannot add JavaScript on the page for SharePoint will rip it out.

(I did not show this own layout as a demo at Techdays - an hour is sooo short!)


Save your layout html (Save and Close, then return to edit mode) before inserting Web Parts in your own divs - otherwise SharePoint just might erase the whole html.

On these wiki page based sites such as Team Sites, you need to create a Web Part Page and use a Content Editor Web Part in order to be able to insert JavaScript on the site. This Web Part Page can be set as the home page of the site in Site Settings > Welcome Page (in Look & Feel category). Another suggested work-around is to add the Javascript references and functions to the page as a linked text file and then call them from the page html. I haven't explored this further myself.

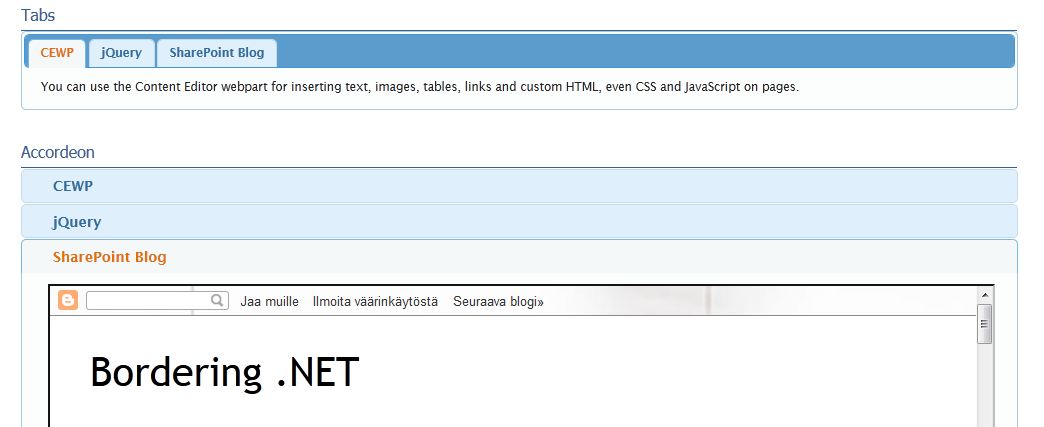
On publishing pages any custom html, css or JavaScript needs to be inserted in a Content Editor Web Part. Then the contents can be edited in a similar way as the contents of a wiki page - except that SharePoint does a little less ripping, so JavaScript can be quite easily inserted too. In my session I demoed a couple different jQuery functionalities:
  • the tabbed or accordion UI (from jQuery UI)

With the jQuery UI, remember the Download tool for getting all the right bits and pieces, and themes too, without needing to copy everything manually!

These are only a couple examples. Exploring the jQuery site and the web more widely, you can find a whole lot of ideas and things to put on your site, and if you learn SharePoint Client Object Model, you can even use the SharePoint libraries and lists in custom functions, e.g. in a picture gallery as above.

Just remember: jQuery shoud be referred to only once per page, otherwise the whole thing goes berserk. See more about JavaScript and SharePoint in my earlier post on the topic. And check out the mobile comaptibility tables to see what the mobile devices support and what not! If you want to really make it happen for the mobile devices too, you might want to consider jQuery Mobile.

JavaScript you can add to pages as demonstrated above, or use it in Web Parts or application pages etc. created in VisualStudio, or add it to a site in an empty module and then delivere it as wsp solutions with features. With the css, you have the possibility to insert it on the page, deliver it in a UI solution or create something in between: an alternate stylesheet. With the alternate stylesheet you get the same css tweaks on every page of your site, or even site collection if you select to inherit the stylesheet  - and you can even manipulate the Web Apps page ribbon to an extent.

The Office Web Apps and Office Web Parts, such as Visio and Excel Web Parts, are more or less untouchables otherwise. You can do some little tricks to the toolbars with css, even with wsp-issued JavaScript, but that's pretty much it. The contents and their styles run down deep in the code, there's no changing e.g. the colors of the Excel chart in the Web Part. Simply does not happen.

The thing to remember with all these customizations is that they are more or less one-time-only. You can copy-paste your html, css, JavaScript etc. and store it in a text file to reuse it (and actually this is highly recommendable even if you only use them in that one site - it's better to edit the text file and then copy-paste it to the page again as it is than try to edit the html that SharePoint has already messed up), but still, it is not an easily maintained reusable content part like a Web Part. So think carefully where the line goes between tweaking and making it for good!

Feb 23, 2012

Using JavaScript in SharePoint Content

With JavaScript, you can boost up your SharePoint page content, take it from being text and images to something interactive and awesome, right? With jQuery it becomes even easier - someone else has already figured out the code, all you need is to copy-paste it to your site, right? More or less, yes. The potential is great, but, how should I put it? There's some quirks involved. (Anyone else having a dêja vu right here?)

Let us start at the beginning. The way to use JavaScript on a SharePoint page is to insert it in the HTML content of a Content Editor Web Part on the page. It works fine on publishing pages and web part pages, but if you try to insert the JavaScript code to the html of a wiki-page, say the home page of a team site, it won't fly. SharePoint edits the page html after you, and while it allows scripts in the html of CEWPs, it doesn't allow them in the wiki content. And it doesn't help to insert a CEWP on the wiki-page, for SharePoint, it does not function there.

We have got as far as understanding that JavaScript is ok in CEWPs. Let's say that you want to be using some jQuery and implement e.g.  three accordions on a single page. With jQuery you need to remember, that you are using a JavaScript library, that normally is referenced only once on a webpage. If you simply copy-paste the jQuery code bits and leave the jQuery reference in situ in all of them, you will run into problems. The browser gets confused and starts reacting funnily to the keyboard, e.g. refreshing a page with F5 might take you to a whole different page.

The thing to do, of course, is to have only one jQuery reference on the page, in the CEWP that the browser reads first, the rest of the CEWPs are able to to use this one reference after the first one makes sure the file gets loaded. Other approaches could be to insert the reference on the page in its own hidden CEWP, thus it is not attached to any single web part using it (and won't get removed if that specific web part gets deleted from the page). Or, if you are building your own master pages and know that you will need the jQuery library, you could insert it to the master pages as well. This might be risky, though, if the content editors creating the jQuery thing-a-ma-jiggies on the pages are not aware of the already existing jQuery reference.

As you go about the inserting some script in a CEWP, I highly recommend you to create a base text file of the scripts + styles + css/js references + the basic html, so that if anything goes wrong, you don't have to start from the scratch all over again. Maybe even include the contents of, say the accordion divs, in the file. When you need to update the content, update the text file and then copy-paste it to the CEWP all over again, deleting all the old stuff first. SharePoint reads the JavaScript when you save the page and inserts all the classes and whatnot that the script feeds to the HTML and for some reason, if you fiddle with the HTML content of the CEWP after SharePoint has fiddled with it, it is bound to break very easily.

One last tip: don't store your JavaScript files in a library that requires publishing and/or approval for the documents. This will only give you problems.

Despite all, have fun with JavaScript and SharePoint! They do work together after you tackle these small details.

Feb 8, 2012

SharePoint Dialog Structure

I was working on our new website UI yesterday, and testing it on a site collection I had for some reason created as a Team Site. I know there are many who say this is the only correct way to do it, but I have never seen the point when the goal is a Publishing Site Collection. The publishing infrastucture works more flawlessly when the Site Collection is built on the Publishing Site template from the very beginning.

Yesterday I found one more reason to continue doing it the way I always have. A website is obviously built by using the publishing sites, publishing infrastructure, so within this test site of mine, I had activated the Publishing Infrastructure feature and created some Publishing sites to test the Page Layouts on. 

One of the things about websites and Foundation based intranet workspaces is that the latter are quite commonly scaling sites with no set width for the page content, whereas the websites and intranet publishing sites too are quite often fixed width sites. This more or less eliminates this problem I encountered yesterday, in most cases. So what was it, exactly?

To the point. When deploying the fixed width master pages to the Foundation based Site Collection, the dialog boxes, e.g. adding a new list item, acted funny, i.e. it used the fixed width of the general master page as the width for the content in the dialog box, while the box frame itself didn't seem to have any clue about the width of the contents. This problem does not exist with the scaling non-fixed width master pages. This problem also does not exist on fixed width sites in a Publishing Site Collection.

Of course I started to dig around a bit, and noticed that in a Foundation based Site Collection the dialog box is built using as many as two iFrames. And with this, if the content has a fixed width, the javascript detecting the needed frame size simply does not follow. Actually, I couldn't get it to follow completely properly (but getting a bit better result) even by changing the content width in dialogs to non-fixed, so some other publishing oriented css messes it up as well, but I didn't dig that far yesterday.

Yep, and the Publishing Site Collections? No iFrames, no problems.

Jan 19, 2012

Creating a Content Type for Custom PageLayouts

Even when you don't use any custom fields on your PageLayouts, and necessary if you do, it is worth its while to create a custom content type (or several, if you need to apply different fields to different PageLayouts) for your PageLayouts for several reasons:

  • custom content type enables grouping the PageLayouts in meaningful groups instead of the Custom group in the PageLayout menu
  • also, for content rollup with CQWP, with custom content type, it is possible to list only the pages that are of the specific content type
  • when using custom fields as well, it is possible to filter the content rollup by the custom field info

Creating the basic Content Type is a quick task. Add a new item to your SharePoint project, of the type Content Type:


Select then "Page Layout" as the base Content Type to inherit from, or one of your existing Content Types:


Edit the Elements.xml; change the Name, Group and Description to your liking.


If you want to create some custom fields for your content types, add the fields to the Elements.xml as Field-elements:


Generate GUIDs for the IDs of the fields.

Then add the field references to the Content Type FieldRefs. After that the Elements.xml should look something like this:


Now, to use this with your PageLayouts, first, set the Content Type of the PageLayout to your custom Content Type in the Elements.xml containing the PageLayout elements by setting the Content Type value and adding a PublishingAssociatedContentType-property with the ContentType ID to the file(s):


If you want to make it easier for the users to fill in the fields, add them to the PageLayout EditPanel:


FieldName gets the GUID ID you generated for the field. 

And maybe some information needs to be visible too, add those fields to the page html as well:


In edit mode, the page looks now like this: 


The Content owner is visible on page (and a bit stylized here):


(Page content from http://slipsum.com, my favorite Lorem Ipsum.)

Jan 18, 2012

About SharePoint 2010 MasterPages

I seem to have dropped bits and pieces of information, here and there, on the MasterPages in SharePoint 2010 and where and how they are and ought to be used when creating a custom UI solution. Time for a summary, here's a few words about the MasterPage usage and inheritance.
  1. There are two different MasterPage settings: the site MasterPage and the system MasterPage
    • Site MasterPage is used by publishing sites
    • System MasterPage is used by foundation sites and e.g. list views also on publishing sites
  2. The two above can be the same, or they can be different, e.g. if the publishing sites have no or a custom left navigation (or the publishing site version of the left navigation), the list views and foundation sites need a master with the quicklaunch navigation
  3. If there is a special MasterPage for the TopLevelSite (e.g. intranet front page), which often is the case (when it is not sufficient to simply hide elements from a special front page PageLayout), set this one first, and then you will need to set the MasterPage separately for each second level site because of the inheritance behavior described below
  4. While all other sites are fine with these one or two masters, the search site needs its own, for by default it uses the minimal.master, so we need to have a custom MasterPage derived from the minimal.master in order to show all elements on the page as should be
  5. About the inheritance:
    • Publishing sites automatically inherit the MasterPage from its parent site
    • When the Publishing feature is turned on for a foundation site, it too inherits the (system) master of its parent site
  6. When activating the custom UI feature with a MasterPage-setting feature receiver, the MasterPages will be set for all existing foundation sites, but not the ones created after this
  7. The MasterPages are referenced in a feature receiver or event receiver as
    • Site Master : CustomMasterUrl
    • System Master: MasterUrl
As to how to create a custom UI solution, see Creating a Custom UI Solution for SharePoint
and for instructions on creating a feature receiver and event receiver for masterpages, see Setting MasterPages to Sites Automatically.

Jan 4, 2012

Building a Custom ContentQueryWebPart

Since I have just gone through building my first custom CQWP for a publishing site collection, step by step, thought I'd share some notes on it. It's basically really not too complicated, but it does have a few quirks to go with it.

ContentQueryWebPart uses two main xsl-files:
  • the ItemStyles.xsl for item templates
  • the contentquerymain.xsl for the outer templates
Most often what you would be interested in customizing, is the ItemStyles.xsl which is located in the Site Collection Style Library, in the XSL Style Sheets folder. This provides the templates for items in the query result, enabling you to e.g. add fields to show, alter the order of fields and add additional html and style classes to item templates. This, of course, requires knowledge of xsl, how deep depends on what you are trying to do.

The first thought might be "ok, I'll open the ItemStyles.xsl to SharePointDesigner and edit it". I say no, you don't. You open the ItemStyles.xsl to SharePoint Designer and copy all its content and paste it to an xsl file in VisualStudio. But wait! We're not that far along yet, so let's back up a bit.

Yes, the correct way to do this is to create a VisualStudio 2010 project and package it as a wsp solution package. So start by creating an Empty SharePoint (2010) Project (remember to check that your Framework is set to 3.5). 


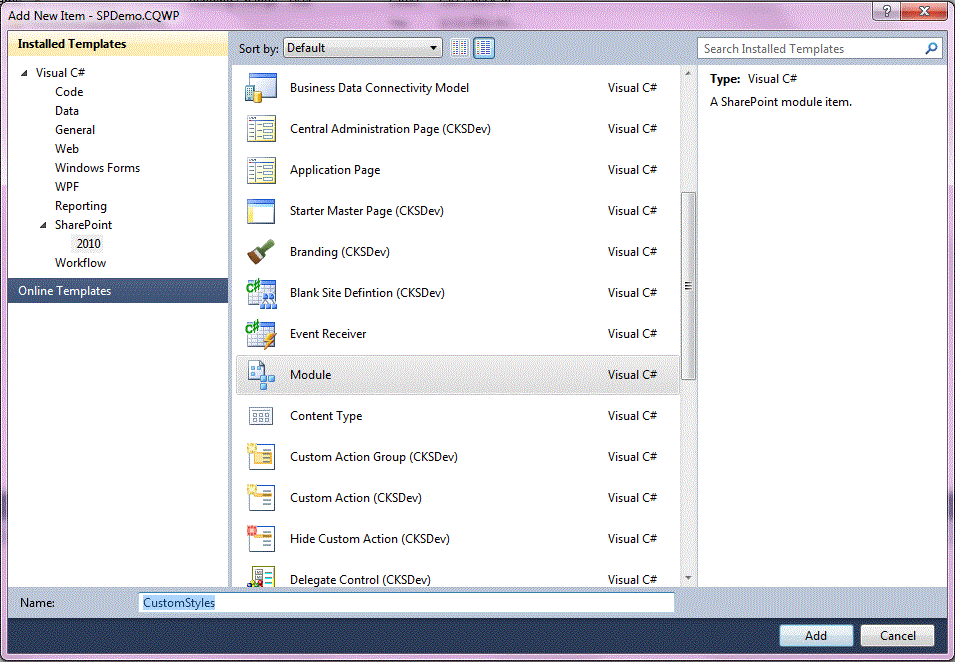
Type a site to use as test site and select the solution type (either one is ok, sandbox or farm). Add a module (Add > New item) in the project:


Delete the Sample.txt file and add a new item to the module:


Note, the item added is xslt-file (from Data category), remember to change the file type to xsl, e.g. CustomItemStyles.xsl.

Open the Elements.xml file of the module and edit the module information by adding the Style Library as the Url for the module and XSL Style Sheets folder as the Url of the item:


Now it is time to locate the original ItemStyles.xsl and open it for editing in SharePointDesigner. There is no need to check it out since there is no need to edit it, simply copy the contents of the file and paste them to the xsl file just created in VisualStudio. VisualStudio will notify (as an error) that the named template OuterTemplate-etc. does not exist, but don't mind this. The OuterTemplates are defined in the contentquerymain.xsl, which will be available for the custom CQWP without needing to copy it to the project.

Now what we ought to do, is select one of the existing templates as the basis for the custom one - this saves a whole lot of work. So if you're not sure which is a good starting place, insert a CQWP on your site and try out the different OOB templates. Then locate the template you want to modify, copy the complete template tag and paste it on the xsl sheet as a new template tag. Modify it as you like - you can move the divs around and create your own (remember to assign a class for your div!), but be mindful to maintain the schema and general structure of the template!

Now, the item template being done, it is time to add the webpart in the project. The OOB CQWP does not know how to use the custom xsl and there is no way to implement it, so we need to create our custom CQWP as well. Add a SharePoint webpart item in the project:


You don't need the webpart's .cs-file, so you can delete that. Then open the browser again, add a new CQWP on a page and export the webpart without setting any properties. Once saved on your disc, open the webpart file and copy and paste its contents to the webpart file in VisualStudio, replacing the default content created by VS.

Change the title of your webpart:


Then locate the properties ItemXslLink and ItemStyle and set them to point to the custom xsl:


Yes, that's right: no slash between ~sitecollection and Style Library.

Furthermore, if you want to make things neat, you might want to change the category in which the webpart is found on the site. The deafult is Custom, but you can change it by opening the Elements.xml file of the webpart and typing your own group name:


Ok, now we're almost done. The last thing to deal with is the features. Adding the module created a feature and adding the webpart created another one. There is no need for two features, so you can delete the other one. The clue is to delete the right one. Double click on each feature to see its properties. The first one only contains the styles module, the second one shows both modules (although you need to add the styles module to the feature items). Delete the first one, and add the styles module to the other one. 

Also, you might want to rename the feature. One thing is to rename the feature in the feature properties and the other to rename the feature file in the solution explorer (right-click the feature > Rename). You might want to do both.


The final thing to do, is add a feature event receiver. Why? Because for some reason at least a publishing site collection otherwise refuses to let the custom CQWP use the custom xsl file, informing that it is not trusted. So this feature receiver corrects this problem by specifically assigning the sitecollection url for the webpart.

Right click your feature and add an Event Receiver to it. Open the event receiver for editing, uncomment the FeatureActivated method and add the following code to the method, changing the wp.File.Name value to your own webpart name.


(Thanks for the feature receiver goes to our coder, couldn't have come up with it myself!)

Note that you need to add the using statements for System.Linq and System.Text.

You're solution tree should now look like something this:


Now you are ready to package, deploy and test the webpart! 

Tip: If you need to do this more than once, which usually is the case, the easiest way to make it happen is to copy-paste the original xsl and webpart files to your disc drive (or such). Then you don't need to always do the same opening and copying all over again.